Vacancies
Vacancies offer a flexible option for rough planning. This allows for the creation of preliminary plans, even when it is not yet clear which employee will be available at a specific time.
This provides a better overview of workload and supports capacity planning. At a later stage, the vacancies can be replaced by your own employees.
Create Vacancy
Similar to the chapter Create Disposition in Project View, a new disposition is created in the project view, and the following window opens (see Fig. Create Disposition with Vacancy Window).
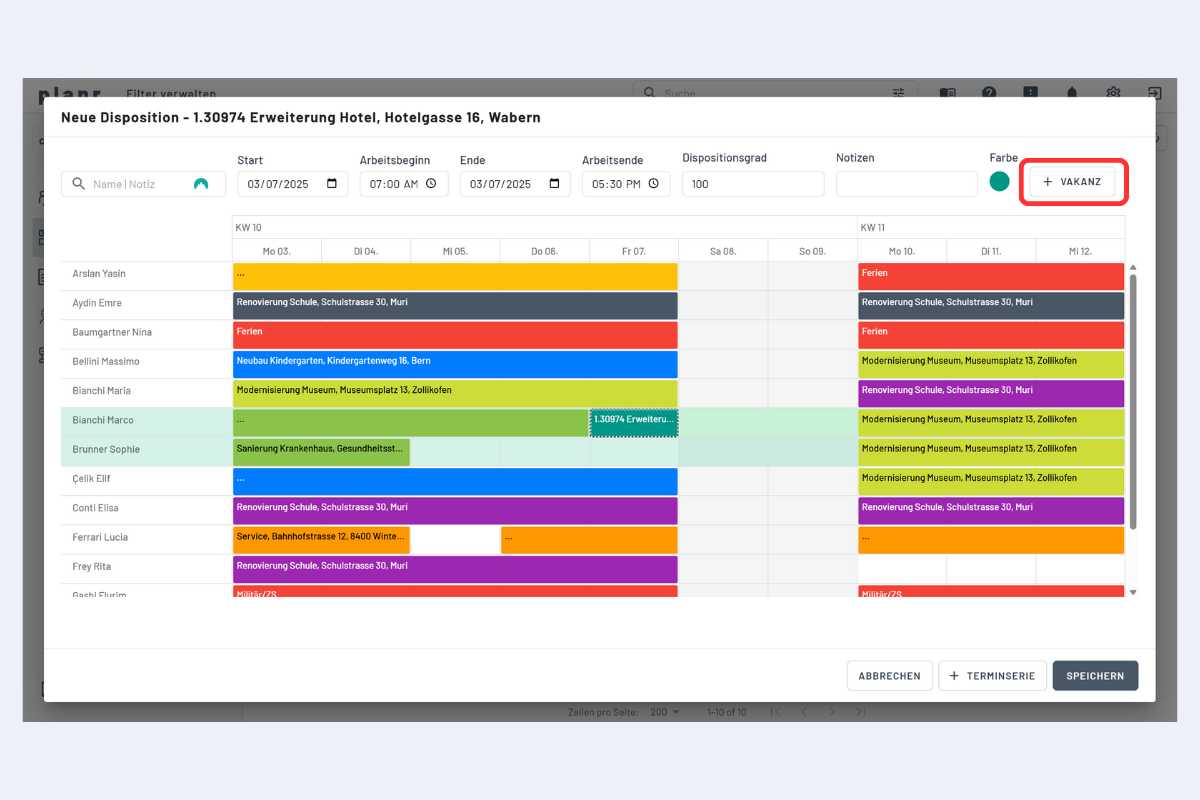
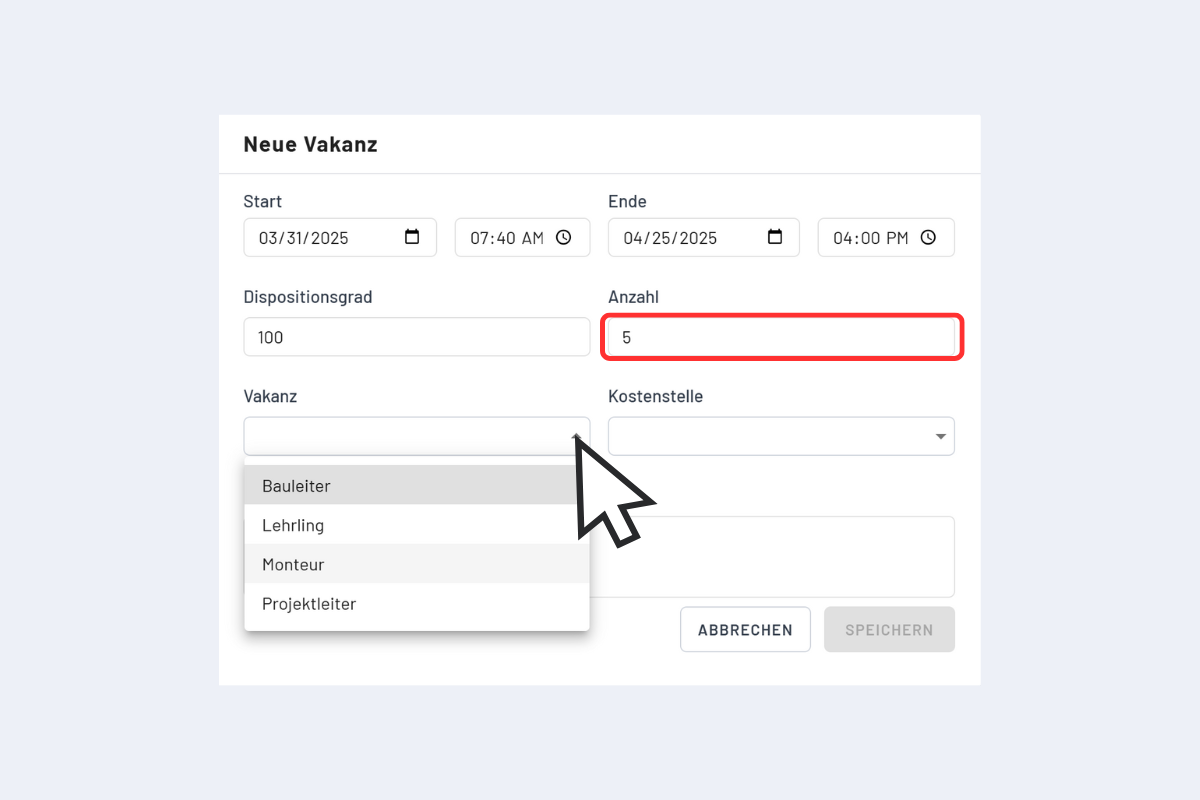
Instead of assigning available employees, provisional dispositions can be created using the Vacancy button (see Fig. Create Disposition with Vacancy Window, outlined in red), and the "New Vacancy" window opens (see Fig. New Vacancy).
Now, the number and the required employee category in the "Vacancy" field can be selected.
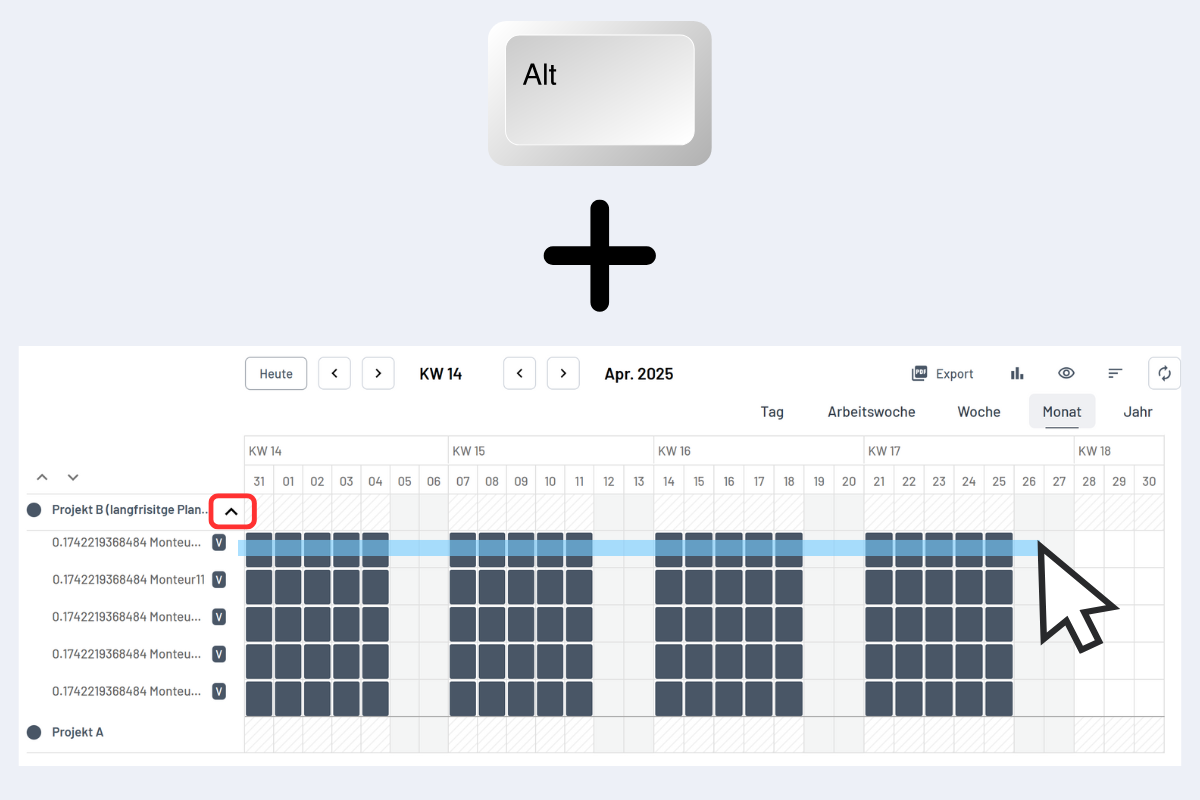
Vacancies are always marked with a "V" and are now also listed as employees in the employee view (see Fig. Vacancy Marking).

Assign Employees to Vacancies
When it's time to plan the deployment, vacancies can be replaced by employees. Only one vacancy can be assigned to a single employee at a time, not multiple simultaneously. To do this, hold down the ALT key and drag a blue rectangle over the desired vacancies in the project view (see Fig. Vacancy Assignment).
Then click on Edit Dispositions (see Fig. Edit All Dispositions).
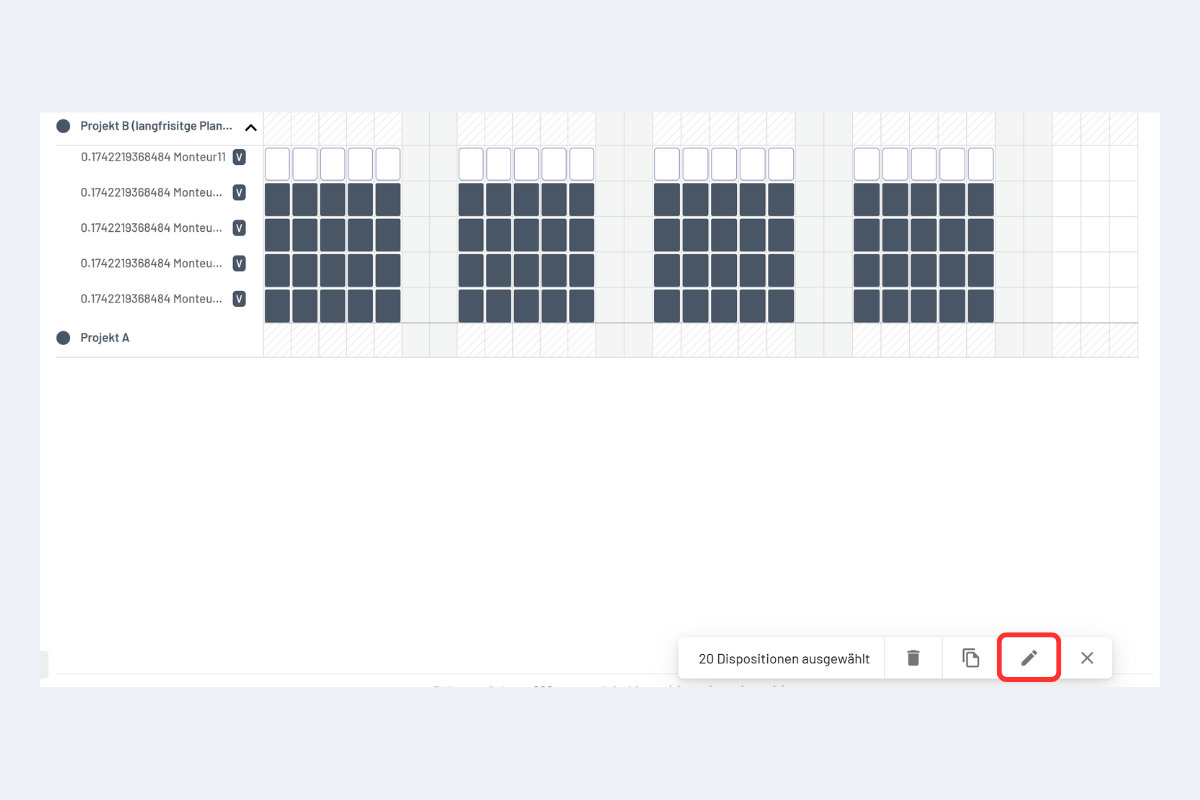
In the subsequent window, select the desired employee.
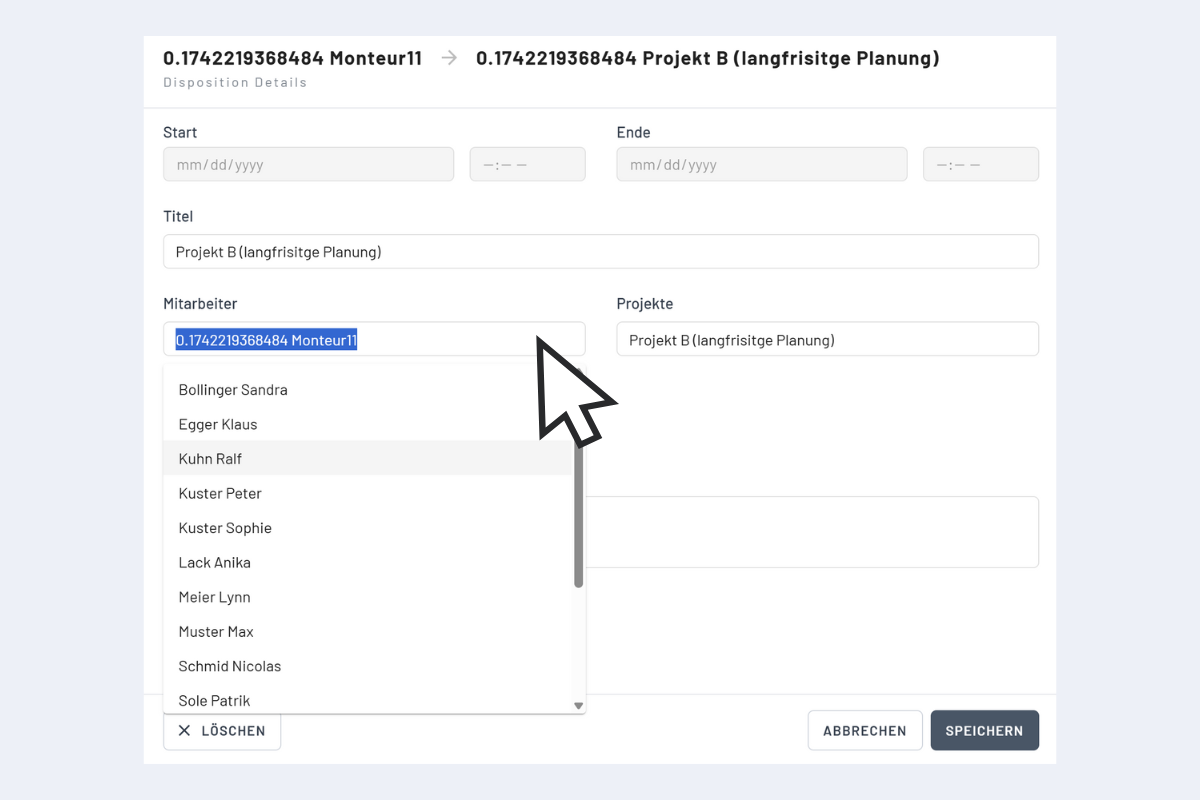
After assigning an employee to a vacancy, the vacancy is deleted, and the disposition in the projects is now displayed with the employee's name.