First Steps with planr
This quick guide walks you through the key functions of planr and helps you get started fast. For detailed information, follow the links in each section.
What is planr?
planr is a web-based application for efficient planning of resources, projects, and teams. No installation is needed; use it directly in Google Chrome or Microsoft Edge. More details in the Basics.
Who is planr for?
- Web application: for everyone who plans – e.g., admin or project lead.
- Mobile View: for employees to see their own assignments and bookings on mobile. With the right permissions, you can also create or edit assignments/bookings on mobile.
Access and login
- Open your browser (Google Chrome or Microsoft Edge).
- Go to the planr website (link provided by the planr team).
- Log in with your credentials.
More details on login and user management in the Basics.
Save the correct favorite: to always open on today's date, save a link without a fixed date. Favorites containing a date always jump to that date. Use a general link ending with aroapp.io as your favorite.
Key functions at a glance
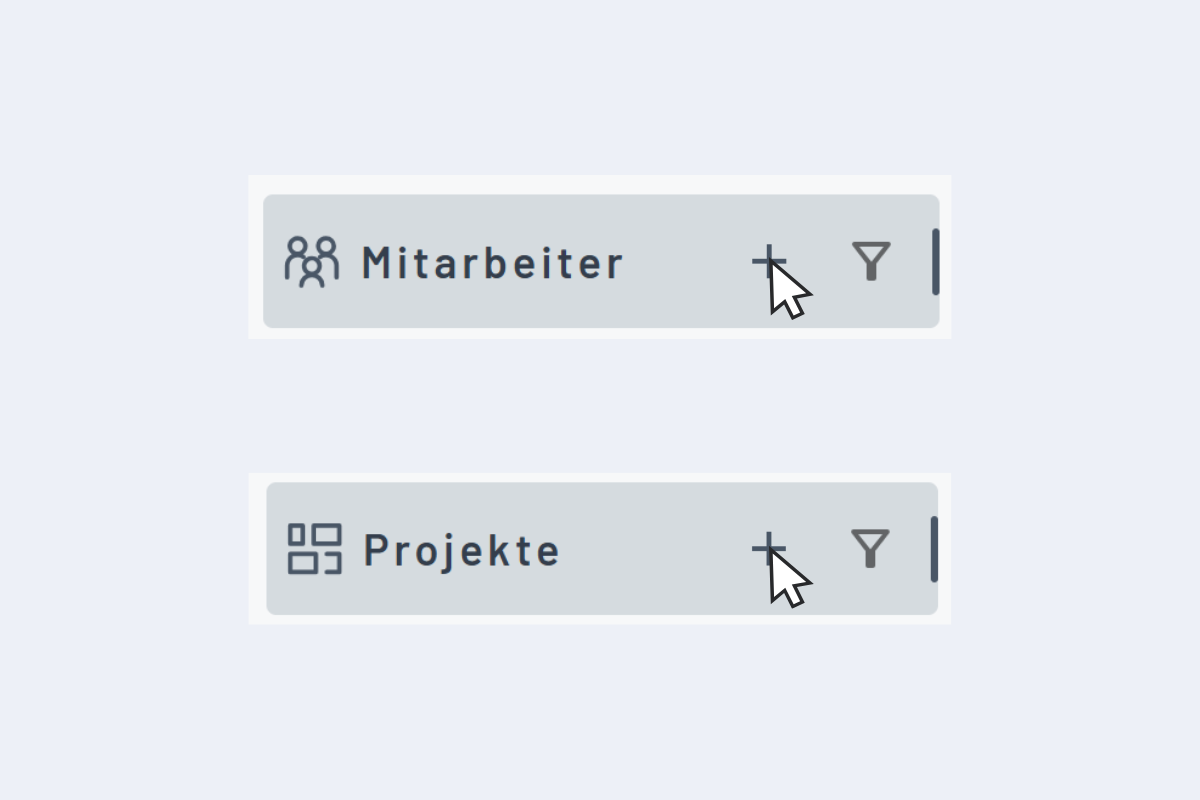
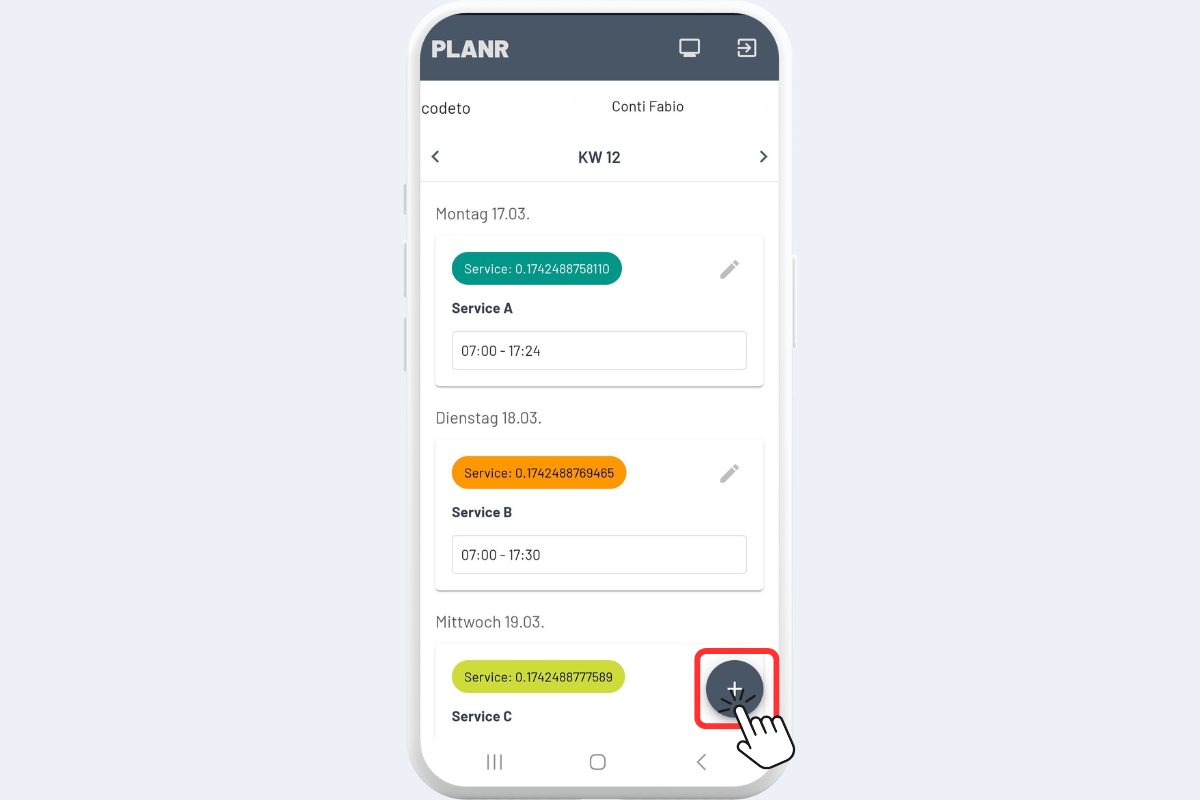
Create new items
To create new items (employees, projects, services, absences, or equipment):
- Click the Plus (+) to the right of the relevant section.
- Enter the required information (fields marked with *).
- Save.
Detailed guides:
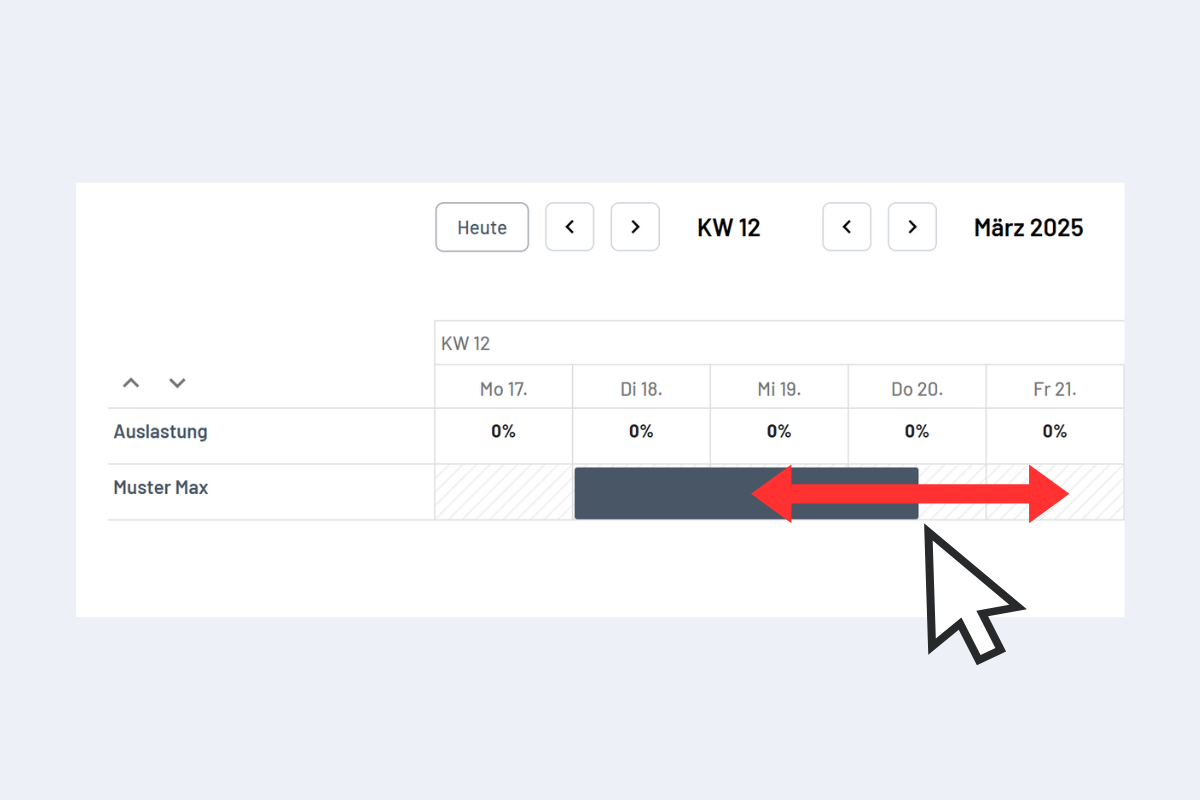
Create a dispatch
- In the employee view, drag a bar over the desired period or double-click.
- In the pop-up, enter details (Project, Service, Absence, Info).
- Save the dispatch.
More details under Dispatch.
On the Projects, Service, Absences, and Equipment pages, creation works the same (drag & drop or double-click). The pop-up shows available employees in green. More on the availability check.
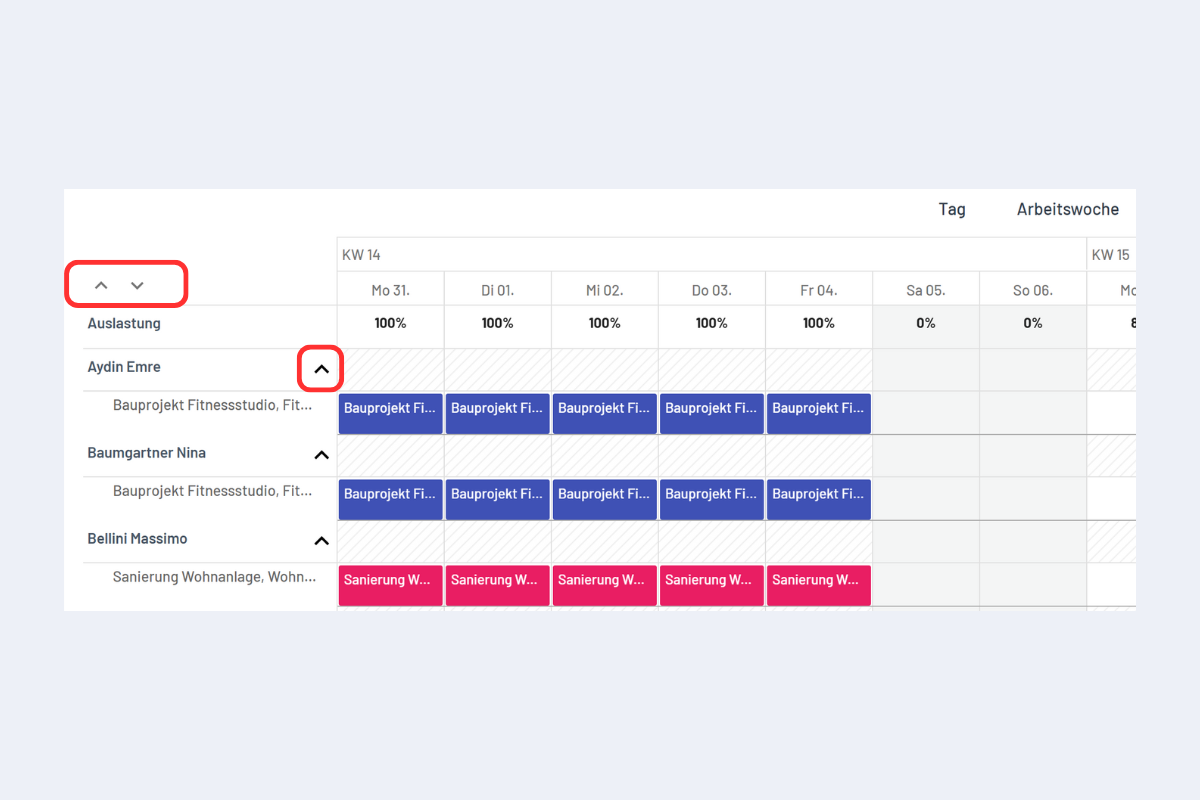
Use the detail view
The detail view offers extended functions:
- Down arrow above all names: expand all rows.
- Arrow to the right of a name: expand a single row.
- Only in detail mode can items be moved, copied, or extended.
More on the detail view: Detail view.
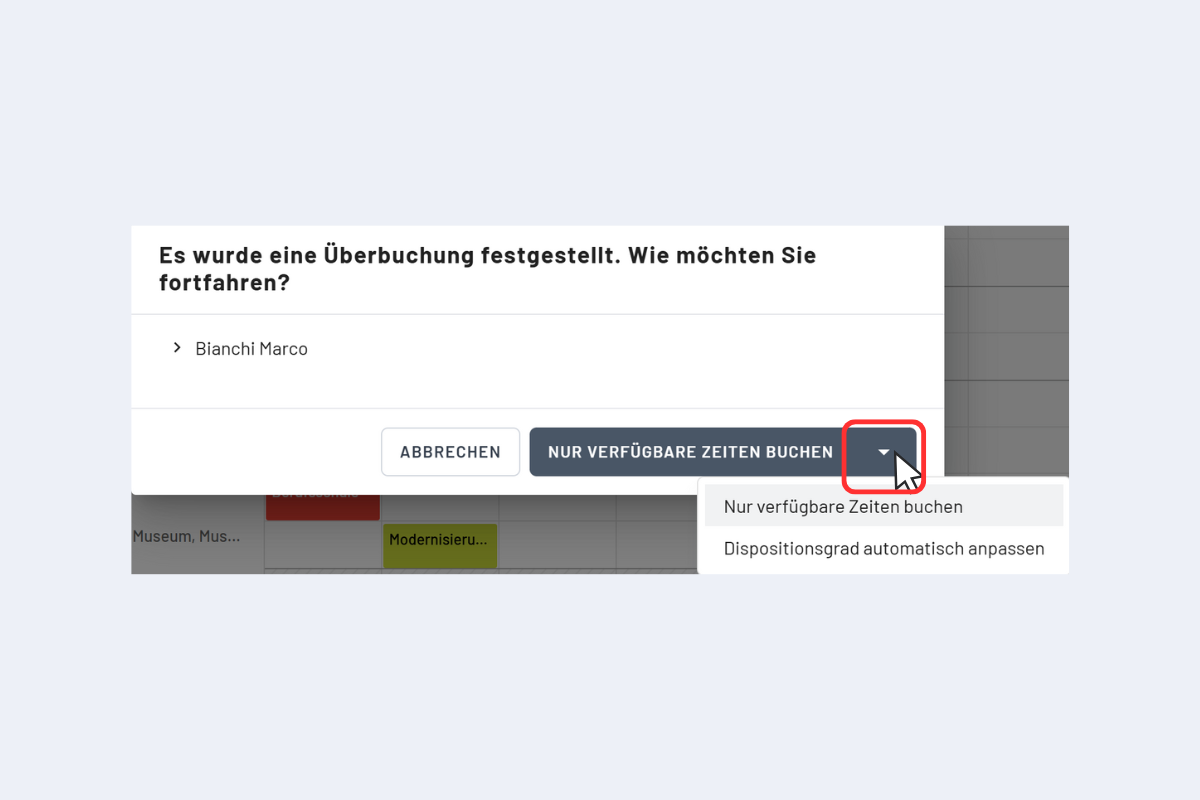
Avoid double bookings
planr prevents double bookings intelligently:
- Automatic detection of overlaps.
- Maximum dispatch level of 100% per time unit (auto-adjusted).
- In conflicts, planr offers options:
- Book only available times.
- Adjust the dispatch level.
- Cancel the booking.
Details under Detected double bookings.
Mobile use
More details under Mobile use.
The mobile version of planr offers:
- View own dispatches
- View assigned equipment
With the right permissions:
- Create new dispatches (plus)
- Edit existing dispatches (pencil)
- Select Project, Service, Absence, or Info
- Adjust date, time, and notes
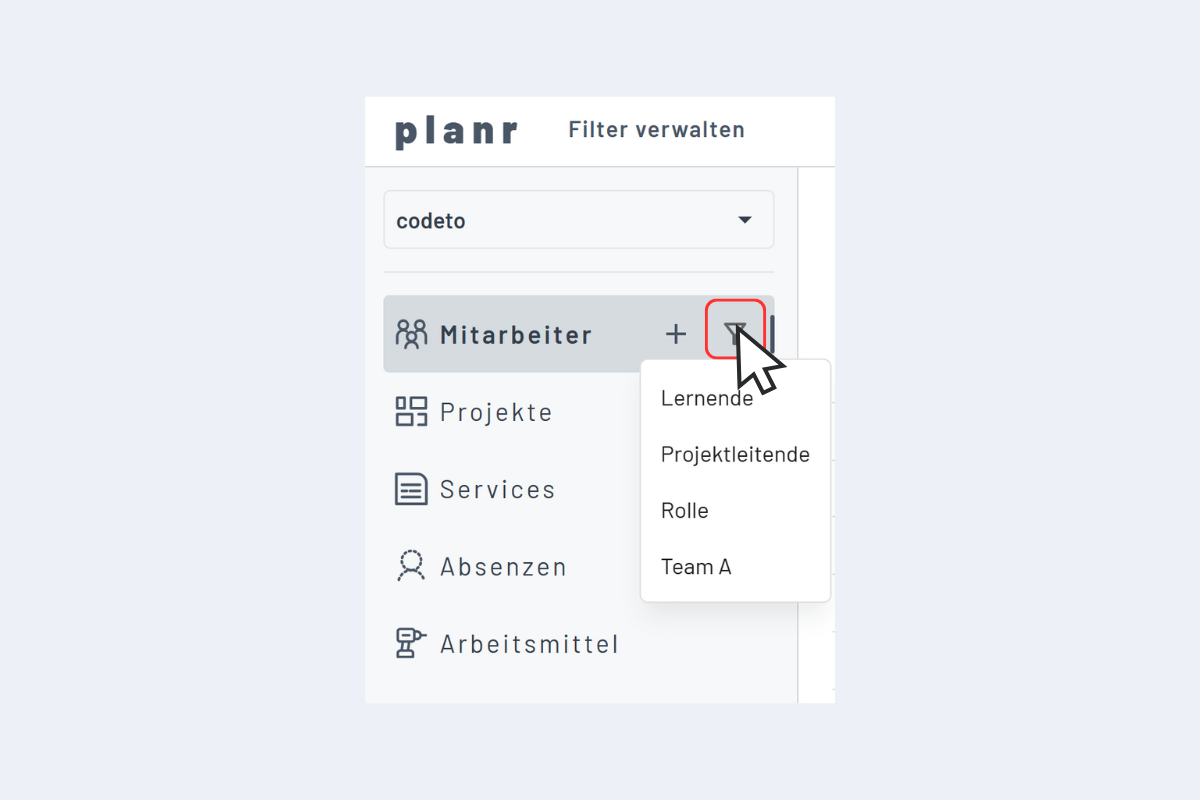
Use filters
planr offers several filter options. More details under Filters.
Filter types:
- My filters: filters you created
- Standard filters: system-provided filters
- Shared filters: filters shared with other users
Create a new filter:
- Click "Manage filters" in the menu.
- Click the plus for a new filter.
- Give it a name.
- Assign a scope (e.g., Employees).
- Add filter criteria.
Clicking the filter icon shows all available filters in the current view. Selected = active.
Apply a filter
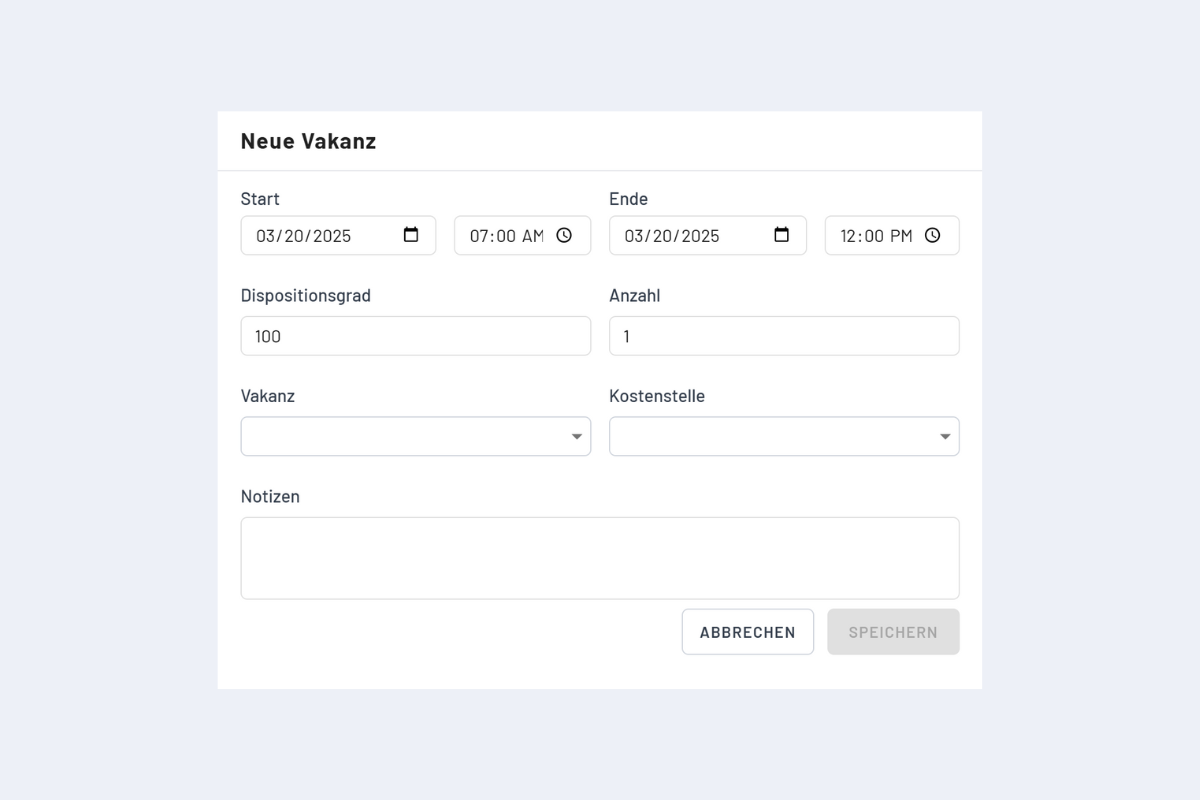
Plan vacancies
More details under Vacancies.
Vacancies let you plan flexibly even if the future assignee is unknown.
Steps:
- Create a dispatch in the project.
- Click "+Vacancy".
- Choose number and category:
- Site manager
- Apprentice
- Installer
- Project manager
You can later replace a vacancy with a specific employee by clicking it and selecting the person in the pop-up. Details under Vacancies.
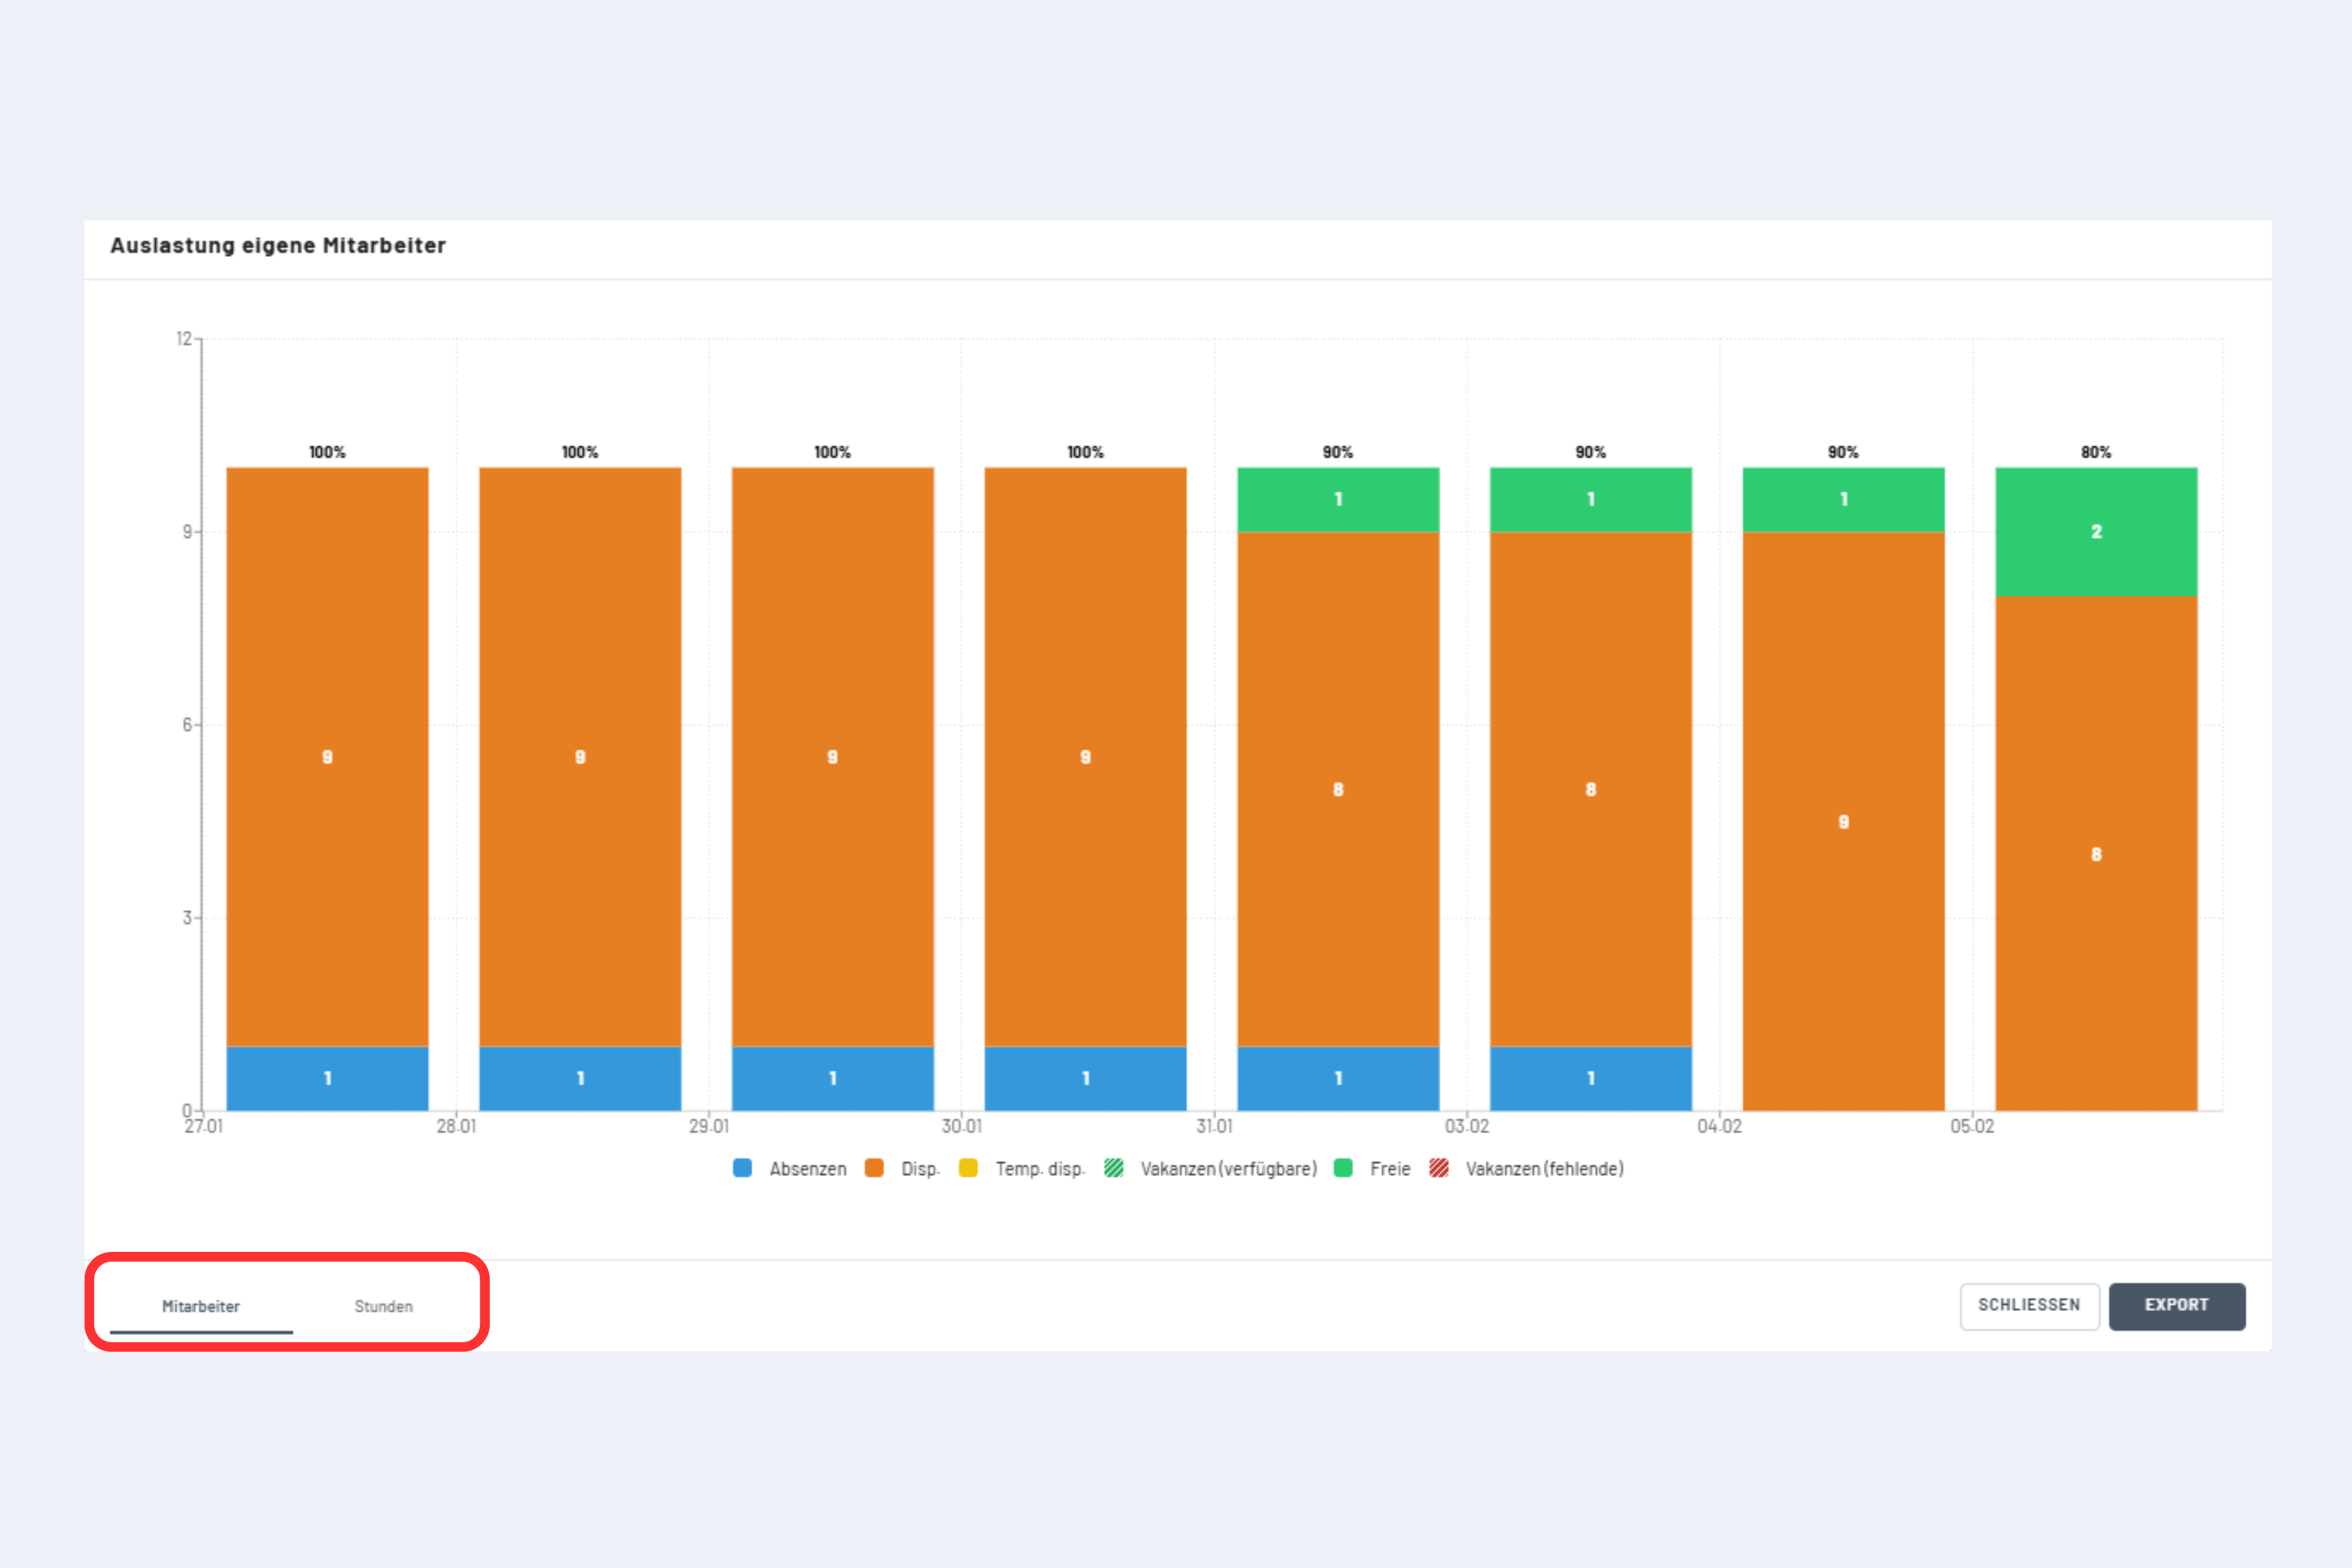
Check utilization
More details under Utilization.
To check utilization:
- Click the graph icon.
- View as week, month, or year (depending on calendar view).
- The percentage shows total utilization including absences.
- Max utilization = 100% (if no vacancies are dispatched).
Views
planr offers several views for different needs:
- Day: detailed daily view
- Work week: overview of the work week
- Week: weekly overview
- Month: monthly overview
- Year: yearly overview
- Three-year view: available in Enterprise environments
More on views and customization: Views & display options.

Use the "Today" button to jump to the current date anytime. More navigation tips under Views & display options.
Select and edit multiple dispatches
Two methods:
- CTRL + click the desired dispatches (see Fig. Select dispatches, top).
- ALT + drag to draw a rectangle (see Fig. Select dispatches, bottom).
Select dispatches (top)
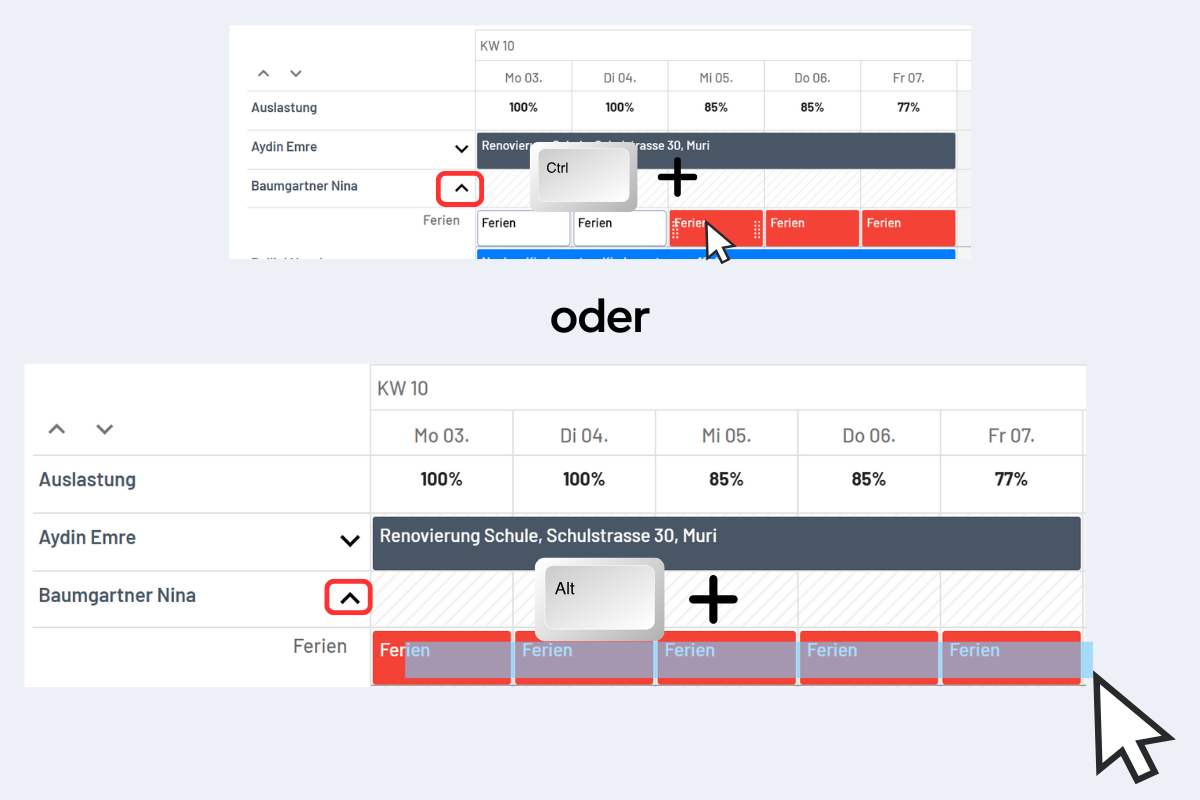
Select dispatches (bottom)
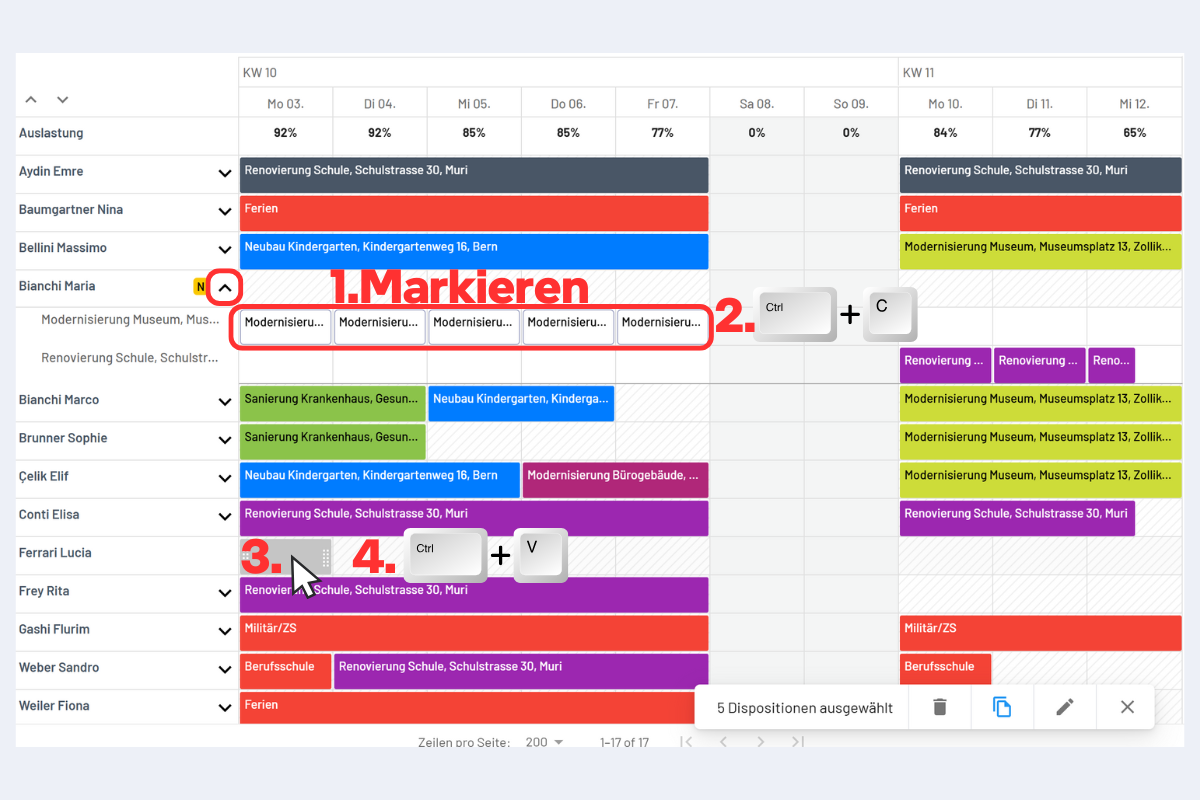
Copy & paste
- Select the dispatch(es) (CTRL + click or ALT + drag).
- Copy with CTRL + C / cut with CTRL + X.
- Click the target cell, then CTRL + V to paste.
More under Copy & paste.
Tips & tricks
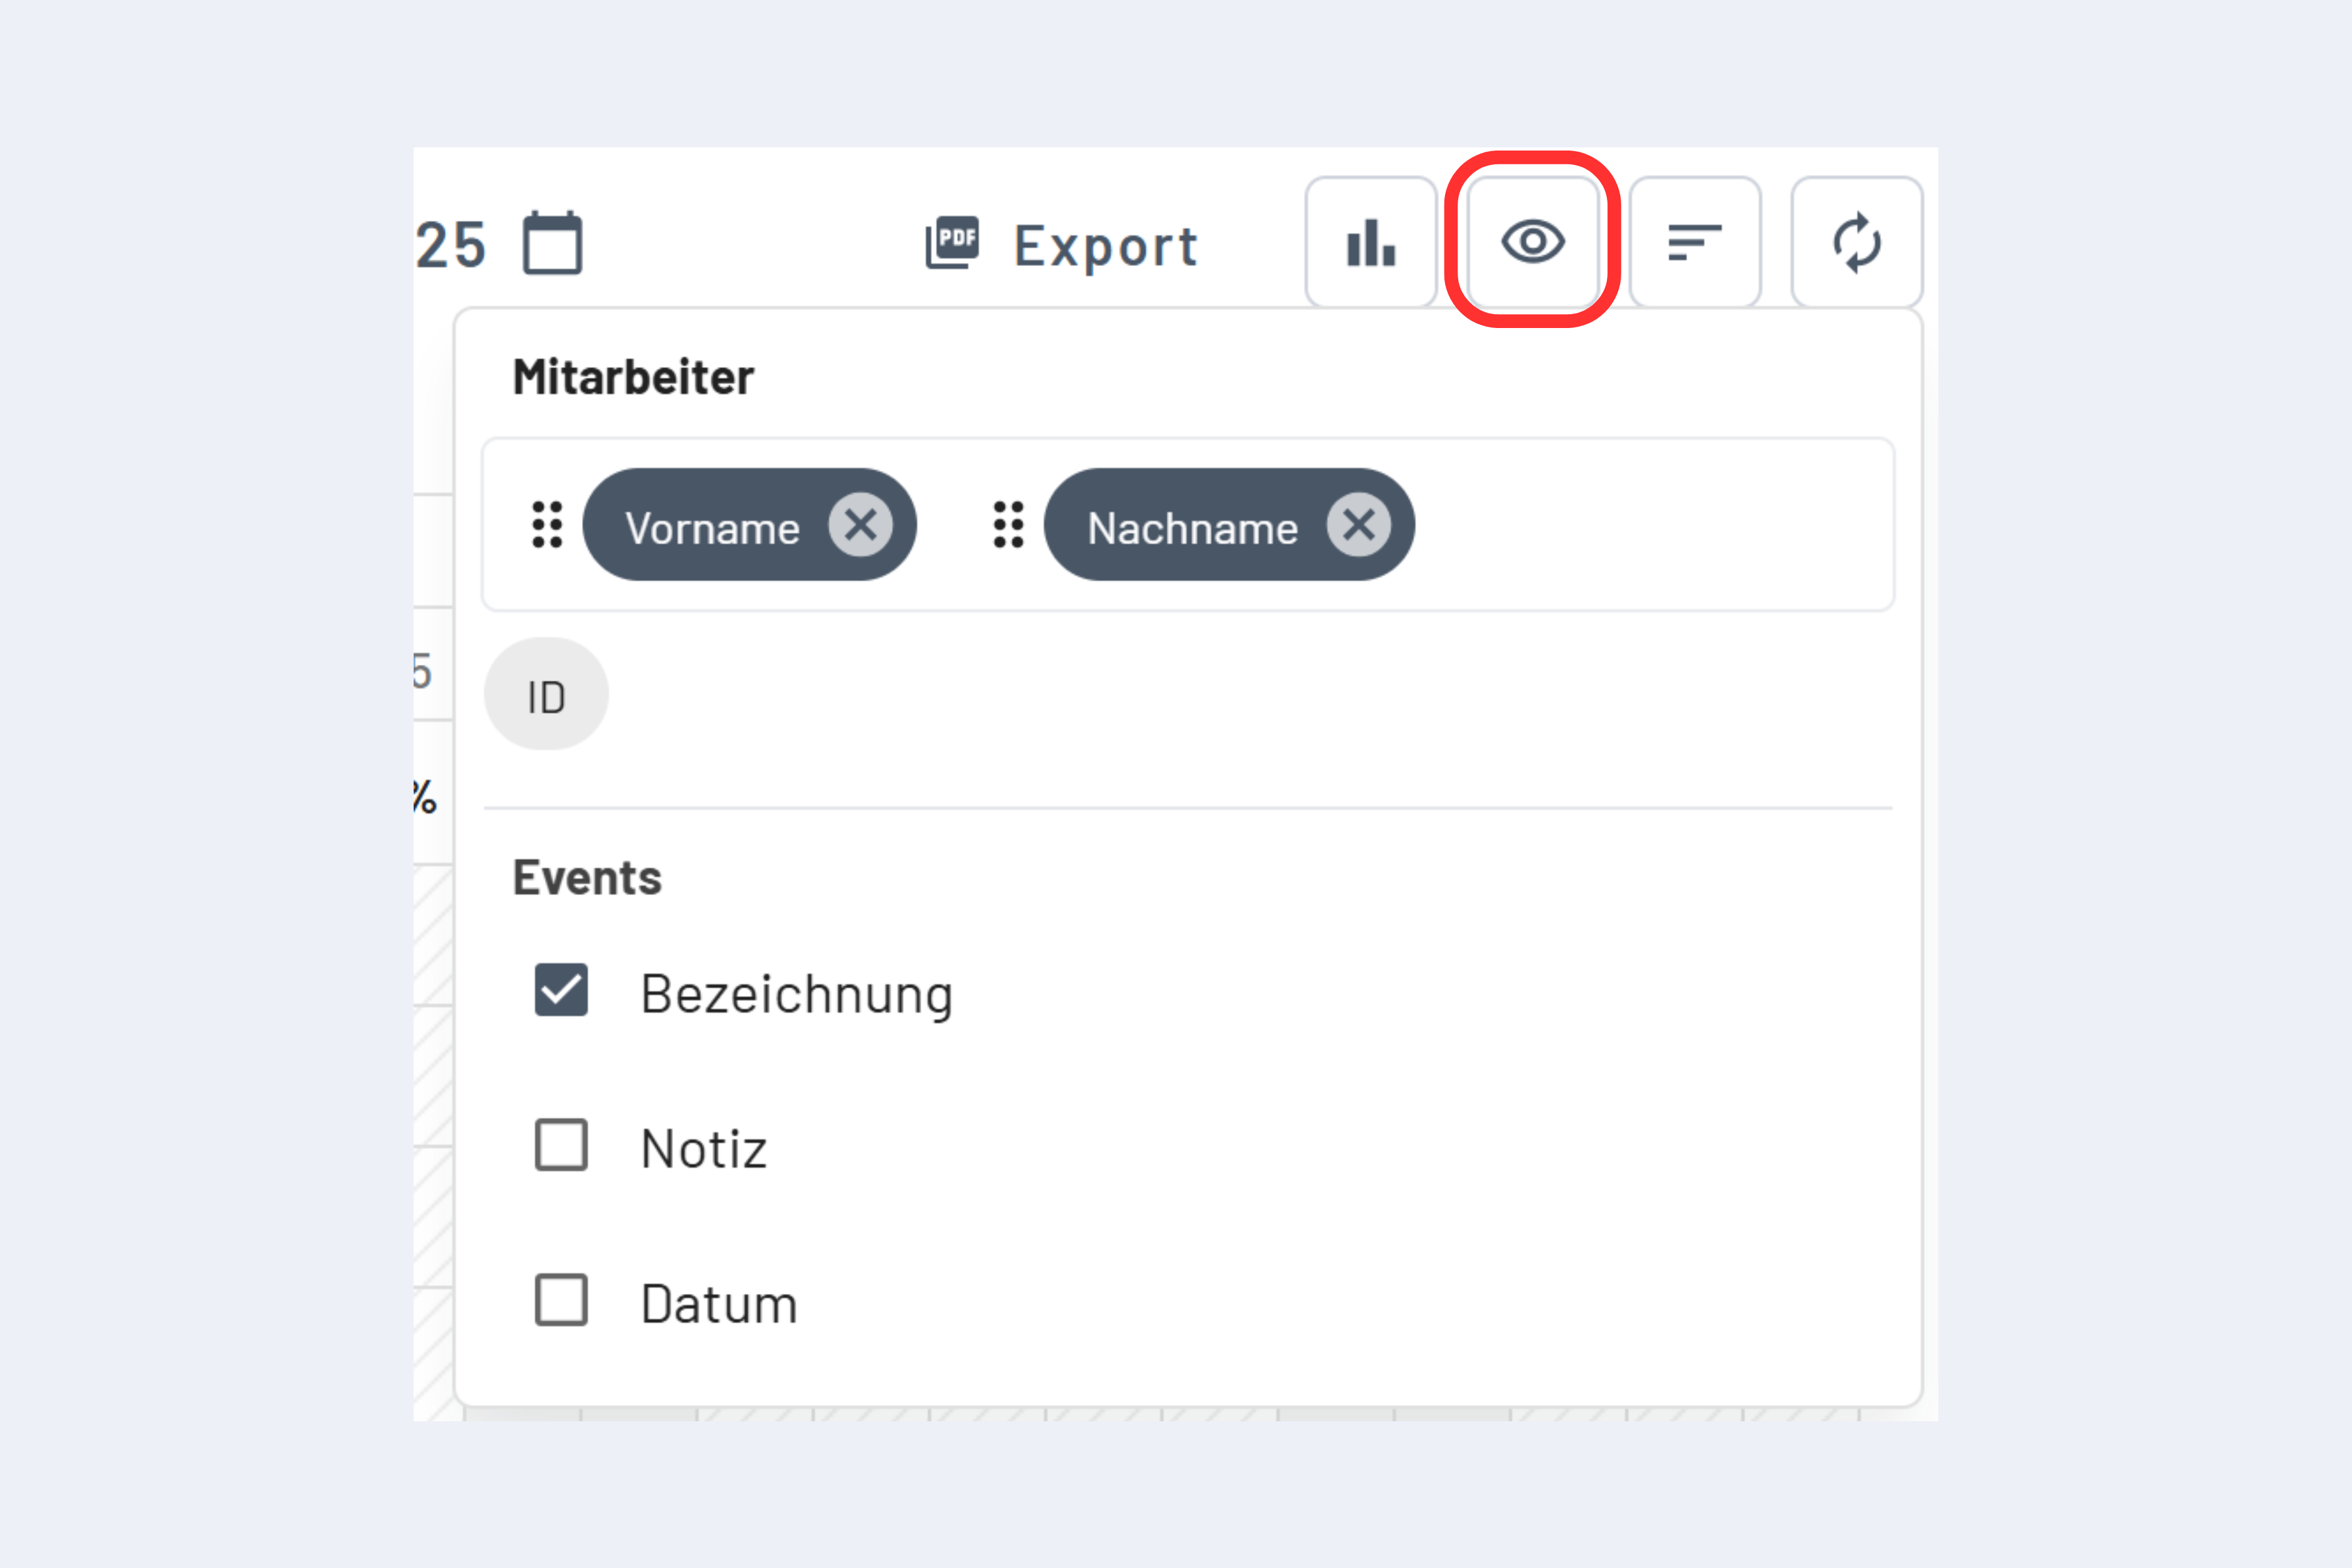
Display settings
- Click "Display" top right.
- Customize bar texts (label, notes, appointment).
More options under Display settings.
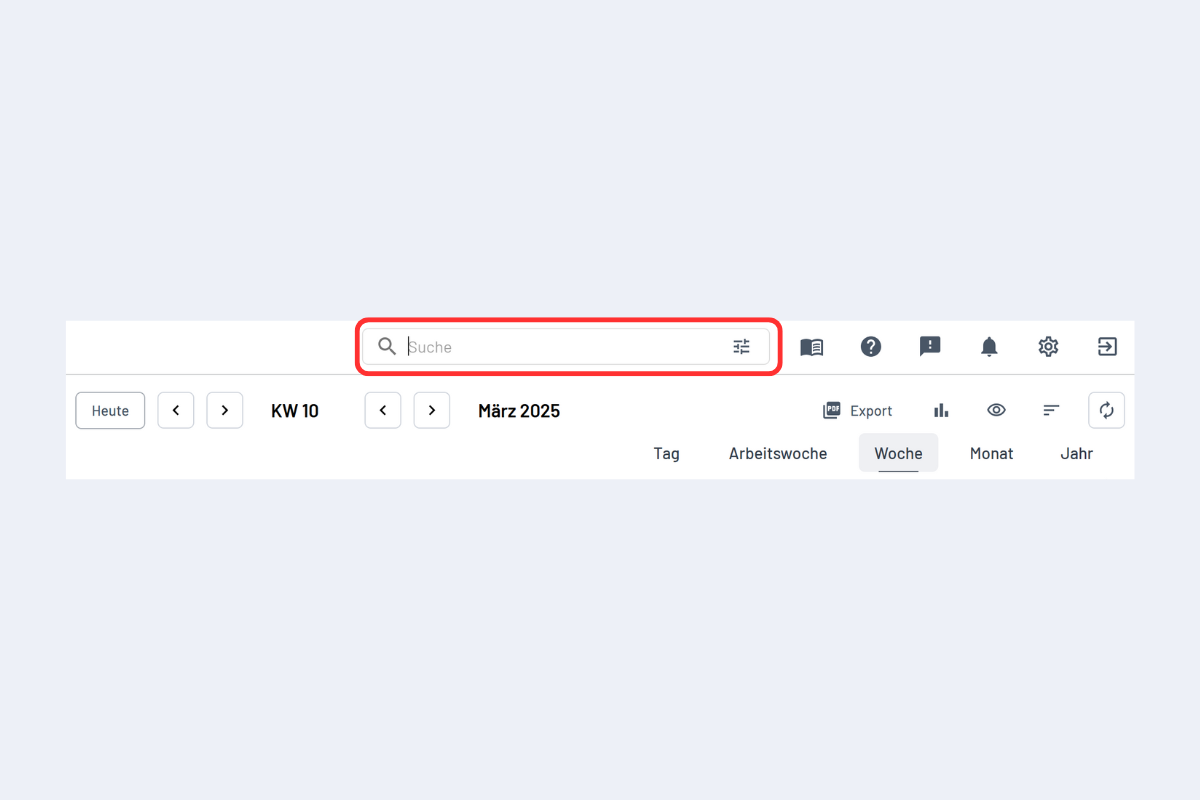
Live search
- Use the search field top right.
- Search starts automatically without Enter.
More on search: Search.
For more detail on specific functions, see the linked sections in the main documentation.